Saturday, December 27, 2014

Best {seal} Show Ever

Happy Saturday!! 
How was your Christmas? I spent a quiet one at home, reading, catching up with all my TV series, crafting, and planning for 2015. 

2014 is coming to an end, have you set your goals and make plans for the coming year? I think I might have pushed myself a bit too hard and wrote down a dozen things to do every weekend. It will definitely be very tough, but great things never came from comfort zone, right? (And, I allow myself to review my plans every month, so I might take half of the stuff out if I really couldn't keep up hahaha)

This week's layout is quite challenging, trying to fit 3 4x6 photos onto a 12x12. I remembered the pocket pages method I learned from an online class, and I did try that out once. But, I usually try not to duplicate my layouts, unless they are of the same theme. 

So, this has got me thinking, and while browsing through my old layouts for inspiration, I found this layout. There are 3 photos on it, but they are not all 4x6 because I trimmed them down. I like the idea of having them lined up on one side, and that was how everything started to fall into place for this layout.


I decided to go with minimal embellishing with this layout, but wanting the title to stand out. Frames are the best way to make the title pops. 


The wooden ticket is too cute, had to put that there. Then I added another label to write down the place of the show.


Lastly, my all time favorite, decorating one of the top corners of the layout. I wanted to add the '#seal' on the layout, but it seemed to be floating alone at the top corner. Then I pulled out a transparency frame as my base, added a vellum sticker, a paper banner, some woodgrain star sequins, and secured the cluster on the layout using brads. The transparency alphabet diecuts are so cute!


Aaaand, another layout done! Though I did spend a lot of time on this one because I was quite distracted while making the layout. Hopefully I will maintain this efficiency and make a layout or card and write a blog post every week. That is my plan for 2015, see how long I am able to keep up with it hahaha

Supplies (Patterned Papers)
  • Picture This by Studio Calico
  • Perfect Picture from Polka Dot Party Collection by Dear Lizzy, American Crafts
  • 3x4 Project Life Cards
Supplies (Letters)
  • Cut Out Thickers by Amy Tangerine
  • Transparency Alphabet DieCuts from June OhDeerMe Kit
Supplies (Embellies)
  • DieCut Frames by Dear Lizzy, American Crafts
  • Wood Ticket, Label Stickers from June OhDeerMe Kit
  • Close Knit Photo Overlays Abbreviated Pack by Crate Paper
  • Mint Jellies by Queen & Co.
  • Woodgrain Star Sequins by Studio Calico
  • Brads

That is all for today. Any comments are appreciated!

If you would like to see more of my layouts and paper craft creation, hit the follow button on my blog and check out my Instagram

This is the last weekend of 2014, I'll see you again in 2015. Have a wonderful weekend!

Saturday, December 20, 2014

Just Chillin'

Hey there, happy Saturday!

Popping up for a quick post on a simple layout I made. But first, let's have a look at the doodle I did for this layout.

Hello, Panda!

I know the panda looks slightly out of shape, but this was my first try on doodling. Hopefully I can do better next time.

This layout is for another item that I crossed off on my bucket list, item #34, see panda(s)! I always thought I would have to travel to China to get a glimpse of these cute, fluffy, black and white, one of a kind national treasure. But on mid of this year, a pair of these cuties were brought to our very own National Zoo! That does save me a lot of money LOL

So, one fine day, my girlfriends decided to go pay the pandas a visit, and I get to capture this cool photo of the panda chillin' at their park/mansion.


And for the whole 30 minutes that we were in there, all the pair does was just that, chilling/sleeping. They didn't move an inch for 30 minutes, which makes me wonder, are they real? (LOL just kidding!)


The layout is very simple, and I used only a few colors. Few shades of greens, cream and some yellow. And of course, black and white.

Patterned papers that I used on the layout


Almost 2/3 of the layout was left blank, intentionally. As I've mentioned, trying to keep it simple. Plus, the green patterned paper that I used at the bottom is quite busy, don't want the whole layout to go crazy and makes you go dizzy.

Supplies (Patterned Papers)
  • Warm Welcome from Polka Dot Party Collection by Dear Lizzy, American Crafts
  • Presh "Right Now" Hashtag Paper from Cut & Paste Collection by Jen Allyson, My Mind's Eye
  • Record from Studio Calico
  • Cream and green cardstock, 3x4 Project Life card
Supplies (Letters)
  • Cut Out Molded Foam Rubber Letter Stickers by Amy Tangerine
  • Patchwork Letter and Number Sticker Book From American Crafts
  • Embossed Mini Alpha from Typo
Supplies (Embellies)
  • Adhesive Chipboard Photo Frames from local bookstore
  • Close Knit Photo Overlays Abbreviated Pack from Crate Paper
  • Enamel Dew Drop Stickers from Freckled Fawn
  • Geotag Chipboard Shapes Stickers and 3x6 * Thickers from Studio Calico
  • Sn@p Icons Stickers from Simple Stories

That is all for today. Any comments are appreciated!

If you would like to see more of my layouts and paper craft creation, hit the follow button on my blog and check out my Instagram

Have a lovely day, cheers!

Saturday, December 13, 2014

Supper Time

Hello, sunshine Saturday! 

Can't believe I'm up at 7.30 am today, and with the help of the natural lightning (oh, glorious sun!) that I desperately needed, I finally took the photos of the layout I did for Let's Get Sketchy December Week 2 challenge. And look at me, blogging before lunch on a Saturday! That's a record hahaha

Look at that banner cluster at the top, how can you not love that?

Such fun layout deserves a fun photo, and these 3 munchkins are definitely up to the task. I really love scrapbooking about these three, even though they don't like their photos taken. 

Random supper time snapshot that my sis sent to us
So cute and happy

The 6x6 patterned paper in grey with the moon and clouds up top and buildings down below is from Yes, Please 6x6 Paper Pad by Amy Tangerine. Love it! Other than the 12x12 grey cardstock and the 6x6 grey patterned paper by AT, all the other patterned papers is from my ever-increasing scrap paper stash. I tried to use a whole bunch on this layout, but I still have a whole lot in an A4 file folder.

Added a little bit embellishments below the photo

Those fabric letter stickers are from Amy Tangerine too!

I did not do any heavy embellishing around the photo and the title. Just a little bit here and there to cover up some awkward angles. And I really love the 'Daily Routine' and all the other strips below the title.

My absolute favorite part of this layout is this tiny little corner up top. I used vellum as the anchoring point for this cluster, and hand cut all the banners from my scrap paper stash. Love it!! Took me a good 30 minutes on this little spot, but I think that 30 minutes was well spent.

Happy banner cluster

A look from another angle.

♥♥♥♥♥♥

And here's the final look of the layout.


Supplies (Patterned Paper)
  • Yes, Please 6x6 Paper Pad by Amy Tangerine
  • 12x12 grey cardstock
  • Patterned papers from scrap stash
Supplies (Letters)
  • Hello Printed Fabric Letter Stickers by Amy Tangerine
Supplies (Embellies)
  • DIY Shop Accent Stickers by Crate Paper
  • Border Stickers by Heidi Grace
  • Stickers by Hello Forever
Supplies (Tools)
  • Heart and Circle Shaped Punches
Any comments are appreciated. If you would like to see more of my scrapbooking layouts and other paper craft creation, do follow my blog as well as my Instagram.

That is all for today, and thank you for stopping by. 
My stomach is grumbling in protest and I need to get some food. Have a lovely weekend! *wink*

Monday, December 8, 2014

The List 1.1

Remember my bucket list back in November 2012? There are a few things that I wanted to change to suit my current life. A lot has changed for the past years, and I would like to update the list to something that I am more capable of completing. I know it sounded like cheating, but.. darn it, it's my list, I can do whatever I want! *la la la*
So, here goes, an updated version of my bucket list, The List 1.1.

1. Set foot in at least 5 continents (Currently: Asia, Europe and Australia)
2. Go to Sydney, take picture of the Sydney Opera House
3. Go to Venice, ride a Gondola
4. Go to Paris, see the Eiffel Tower
5. Go to London, see the Big Ben
6. Go to Pisa, take a silly photo with the Leaning Tower
7. Go to Kyoto, visit the Golden Pavilion
8. Go to Kyoto, visit the Kiyomizu Temple
9. Go to Beijing, visit the Forbidden City
10. Go to New York, take picture of the Statue of Liberty
11. Climb Sydney Harbour Bridge Go to Kinmen (grandparents' birthplace)
12. Visit the Smithsonian Museums in Washington DC
13. Visit 5 more Museums
     (a) Australian Museum, Sydney
     (b) Powerhouse Museum, Sydney
     (c) National Maritime Museum, Sydney
     (d) Natural History Museum, London
     (e) Louvre, Paris
14. Take picture with 10 famous person
15. Spend New Year's Eve somewhere else
16. Experience a White Christmas
17. Visit Disneyland
18. Visit Universal Studio
19. Visit the Wizarding World of Harry Potter
20. Experience Spring
21. Experience Autumn
22. Experience Winter
23. Watch sunrise and sunset
24. Witness 3 astronomical events
25. Go on a cruise
26. Go on safari
27. Visit a food processing factory
28. Ride in a hot air balloon
29. Ride a Ferris Wheel
30. Ride a Roller Coaster
31. Ride a Segway
32. Ride a subway Try skiing
33. See koala
34. See panda
35. See fireflies
36. See penguins
37. Ride a camel
38. Ride an elephant Travel by myself
39. Play gold once
40. Bowl a Strike
41. Horseback Riding
42. Fencing
43. Archery
44. Fly a kite
45. Learn to Juggle
46. Take up photography Become a decent photographer
47. Fishing
48. Learn to do a split
49. Go ice skating
50. Go paintballing
51. Go parasailing
52. Go for reflexology
53. Go to a concert
54. Participate in treasure hunt
55. Complete a 1k pieces puzzle
56. Get a self portrait by street artist
57. Take a flight alone
58. Plan my own travel itinerary
59. Go to the movie alone
60. Fire a pistol gun
61. Dye my hair
62. Fly first class
63. Stay a night in Presidential Suite
64. Reread Harry Potter series
65. Bet $50 on 'Red' with Roulette
66. Speak 5 Languages
      (a) English
      (b) Mandarin
      (c) Malay
67. Learn a musical instrument
68. Learn to cycle
69. Learn to swim
70. Eat Escargot
71. Have Cheese Fondue
72. Eat Caviar
73. Eat fresh oyster
74. Cook a decent meal
75. Bake a cake
76. Finish alphabet ATC series Run a Marathon
77. Be a part of any paper crafting design team
78. Participate (physically) in a craft class
79. Complete a gratitude journal Score 20 points in At the Gates of Loyang
80. Try zentangle doodling
81. Finish a coloring book
82. Take a photo everyday for a year
83. Scrapbook every week for a year
84. Solve the Rubik's Cube Journal everyday for a year
85. Participate in NaNoWriMo
86. Submit an article for magazine/newspaper and get published
87. Start a blog and maintain it
88. Write a fiction story
89. Get a pen pal Send some happy snail mail to someone
90. Write a letter to future self
91. Have $1 mil in bank Be in a good shape
92. Invest in stock market Donate handmade cards for elderly
93. Own a shop (not in brick and mortar form, related to my crafty hobbies)
94. Pay off my student loan in 10 years
95. Donate anonymously
96. Volunteer for a charity event
97. Become an early riser
98. Sponsor a child
99. Life Long Learning Complete an online course every quarter for a year
100. Get married before 30
101. Complete this bucket list

    Color Coding:
    Done
    Half-way

    I have crossed off 23 items on the list so far. There are a few more that I think I can accomplish on the coming year, if I am determined (eg. learn to juggle, archery, to do a split).

    I have replaced a few items with new ones to better suit my current wants and needs. The first list that I did, some of the items are not really what I wanted, but it was on others' lists, so I kinda copied them and placed in my own list. So after two years and knowing myself better, I removed them and try to replace them with new items. The list might change again, or get longer, but right now, these items on the list are what I really wanted to try, and hopefully I can achieve them before I hit 30.

    So, this is my boring and not-so-exciting bucket list. December is here, and it's about time for another round of New Year Resolutions planning. I did not do well on this year's resolutions (did I even make one this year? LOL), but I am much more determined to do better next year. I have started writing and planning since last week, but there is still a lot more fine-tuning to do for the plans and goals to be achieved effectively. I will share more when I am finally done with the planning, hopefully by end of this month. =)

    Thank you for stopping by. Have a great week!

      Sunday, November 30, 2014

      So Totally Wonderful

      Hello hello, Happy Sunday!

      This week's post is a short one, it's about a simple handmade card I made. 

      I bought some clear stamps and a pack of A6 Card Blanks few weeks ago, in an attempt to convince myself to get back to cardmaking. So, this is the first card I made after my very long break from cardmaking. (The last card I made was in April 2013 *gasp*)

      Without further ado..

      Ta da~~

      Oh so cute!

      Oh so wonderful =p

      I really really love this Hispter Pets stamp by Some Odd Girl, so darn cute!! The sentiment stamp is by Technique Tuesday. Since this is my first card after a break so long, I tried to keep it simple. Of course, every time I do stamping, the first image will definitely have some flaws/smudges etc., so this is actually my second try. Glad this one turned out okay. =)

      The first image did not go to waste though, I fuzzy cut it and placed it in my planner, along with the colors that I used to color the image. I used Faber-Castell classic color pencil, nothing fancy.

      Excuse this over exposed image, I took it with my new HTC M8
      And since I'm all about fully utilizing the knock off version planner of mine these days, I wrote down the supplies I used for this card on a blank page and keep it in my planner. But I don't think writing the supplies I used and placed it in the planner is a good practice, so I will stop doing it. But for now, I'm kinda lazy to type them out, so here you go.


      That is all for today. Thank you for stopping by. If you wish to see more of my paper craft posts and photos, do follow my blog and my Instagram

      Have a lovely evening!

      Sunday, November 23, 2014

      Ribs & Rumps

      The place where I fell in love with Lamb Ribs!

      Hello hello, happy Sunday! 

      This is another layout that I did two weeks ago. It is kinda minimalist style in my book. I only used a patterned paper and a cardstock, some thickers/letter stickers with minimal embellishing.

      There is a 4 x 6 portrait photo with two (approx.) 2½ x 3½ portrait photos, and I centered them on the layout with a cardstock stretching behind the photos.


      My favorite part will be where the title sits. I love both the Chipboard Letter and Foil Letter stickers. Adding washi tape behind the Chipboard Letter stickers makes the title pops.

      Love!

      Then I added some embellishments around the photos. The 'Love It' stamp kinda ruined the layout a bit, I should have tried stamping it on some papers before stamping it on the layout. Anyway, lesson learned, I will be more careful next time, and for this time, I will just leave the little flaw on the layout.


      all about good food

      life is good

      Supplies (Patterned Papers)
      • All in All and Kraft cardstock by Studio Calico
      Supplies (Letters)
      • Muse Printed Chipboard Letter Stickers and Hardcover Foil Letter Stickers by American Crafts
      • Alpha Stickers by Becky Higgins Project Life
      Supplies (Embellies)
      • Scattered Red Polka Dot Washi Tape by Freckled Fawn
      • Black Label Stickers by Jenni Bowlin Studio
      • Life is Good Sticker Sentiments by SRM Stickers
      • Chipboard Arrows Stickers by Studio Calico
      • 'Love It' stamp by Typo
      • Puffy Sticker by twine + ink

      That is all for today, thank you for stopping by. :)

      Any comments are appreciated, and if you would love to see more of my scrapbooking layouts and other paper crafts related posts and photos, please follow my blog and Instagram.

      Have a lovely Sunday!

      Sunday, November 16, 2014

      Family

      Hello hello, Happy Sunday!

      This is a layout that I made using My Scraps & More Sketch #93. I'm starting to love the design of having two patterned papers as background, but it is also a challenge because of how you need to make sure each patterned paper has their fair share of spotlight. I usually use a blank cardstock or subtle design paired with a busy design, like I did with my previous two layouts with similar sketch concept, Udon and Mama

      The layout is about my eldest sister and her family, so I incorporated a lot of family/houses-themed and fives in the layout. And for this layout, I used 3 different patterned papers, with different themes (clouds, houses and flowers), which is not my usual scrapbooking habit. I usually will only choose one main theme for the patterned paper, and use others subtle design. I quite like how this turnouts, and probably will try it again on other layouts.


      Supplies (Patterned Papers)
      • Warm Welcome, Polka Dot Party collection by Dear Lizzy and Vanilla cardstock from American Crafts
      • Yes, Please 6x6 Paper Pad by Amy Tangerine
      • Charm "Bliss" Delight, Cut and Paste collection by My Mind's Eye
      Supplies (Letters)
      • Wooden Letters from Typo
      Supplies (Embellies)
      • Bits Die Cut Cardstock Shapes and Pigment Fabric Stickers by Amy Tangerine
      • Close Knit Photo Overlays Abbreviated Pack by Crate Paper
      • Orange Polka Dot with Heart Washi Tape by Freckled Fawn
      • Border Stickers and Tweet Memories Layered Chipboard Stickers by Heidi Grace Designs
      • Mustard Color Shine by Heidi Swapp
      • 6x8 Perforated Word Strips by Studio Calico
      Supplies (Stamp and Ink)
      • Stamp set by Studio Calico
      • Orange, ColorBox Classic Pigment Cat's Eyes

      Thank you for stopping by, any comments is appreciated. And while you're at it, please follow my blog and Instagram account.

      That's all for today, have a lovely Sunday. 

      Sunday, November 2, 2014

      Wacky Duo

      Hello, long abandoned blog! And happy Sunday, dear readers.

      (Skip the next 2 paragraphs if you're not interested with my excuses for being away)

      Sorry for being away for so long, but this time I have a few very good reasons for being absent LOL I was away for vacation for almost 2 weeks in September, and when I came back, I started working on a new job. Then I switched from scrapbooking to reading. I just bought too many books and had to finish a few of them so I can buy more =p

      I am still in the process of adapting to my new work and planning out my free time because I have too many hobbies, and trying to juggle between them makes me accomplish NOTHING at all, which is quite frustrating. Then, I decided to join the planner-craze. I wanted to DIY my own planner, and that has taken up most of my nights these days because I am still trying to find a format that fits my needs. Scrapbooking, reading, online courses, planner decorating, hanging out with friends, spending time with family, catching up with all my favorite TV shows and among other things. Trying to fit all these on a 2 days weekend, that is quite impossible. Or is it just me with the time management issue? 26 and still have no idea how to manage my time, am I the only one? *hopefully not* 

      So, back to this layout that I did. It was supposed to be blogged and posted on my social media last weekend for my sister's birthday, but you know me, BIG procrastinator. 

      I was on a creative rut but I really wanted to push myself to create something, so I used the sketch from Come On Get Crafty October Sketch Challenge, which is a fairly simple and minimalist sketch. 

      I have this patterned paper from My Mind's Eye for a while now, and I have difficulty using the A side, but the B side is a simple white and gray chevron and that is perfect as a background. Adding some red and green and yellow to make it pops, with the wacky photo of my sister and her husband, voila, a layout is done! As simple as ABC, but it still took me a very long time because I was watching some dramas while making the layout >.<

      Hello, wacky duo!

      Love the Title and the Photo Frame!

      And also the patterned paper by Amy Tangerine in the frame

      Say CHEESE

      This tiny embellishment cluster 


      Supplies (Patterned Papers)
      • Sky's the Limit from Find Your Wings & Fly Collection and Banners from Love Me Collection by My Mind's Eye
      • Yes, Please 6x6 Paper Pad by Amy Tangerine
      Supplies (Letters)
      • Muse Thickers by American Crafts
      • Honey Sticky Keys by October Afternoon
      Supplies (Embellies)
      • Enamel Dew Drop Stickers and Scattered Red Polka Dot Washi Tape by Freckled Fawn
      • 6x8 Perforated Word Strips by Studio Calico
      • DIY Clear Stickers Messages by Simple Stories
      • Adhesive Photo Frames from local bookstore

      That's all for today. 

      Thank you for stopping by, and hopefully I will have another layout done by next weekend to share with all of you. Cheers!

      Sunday, August 10, 2014

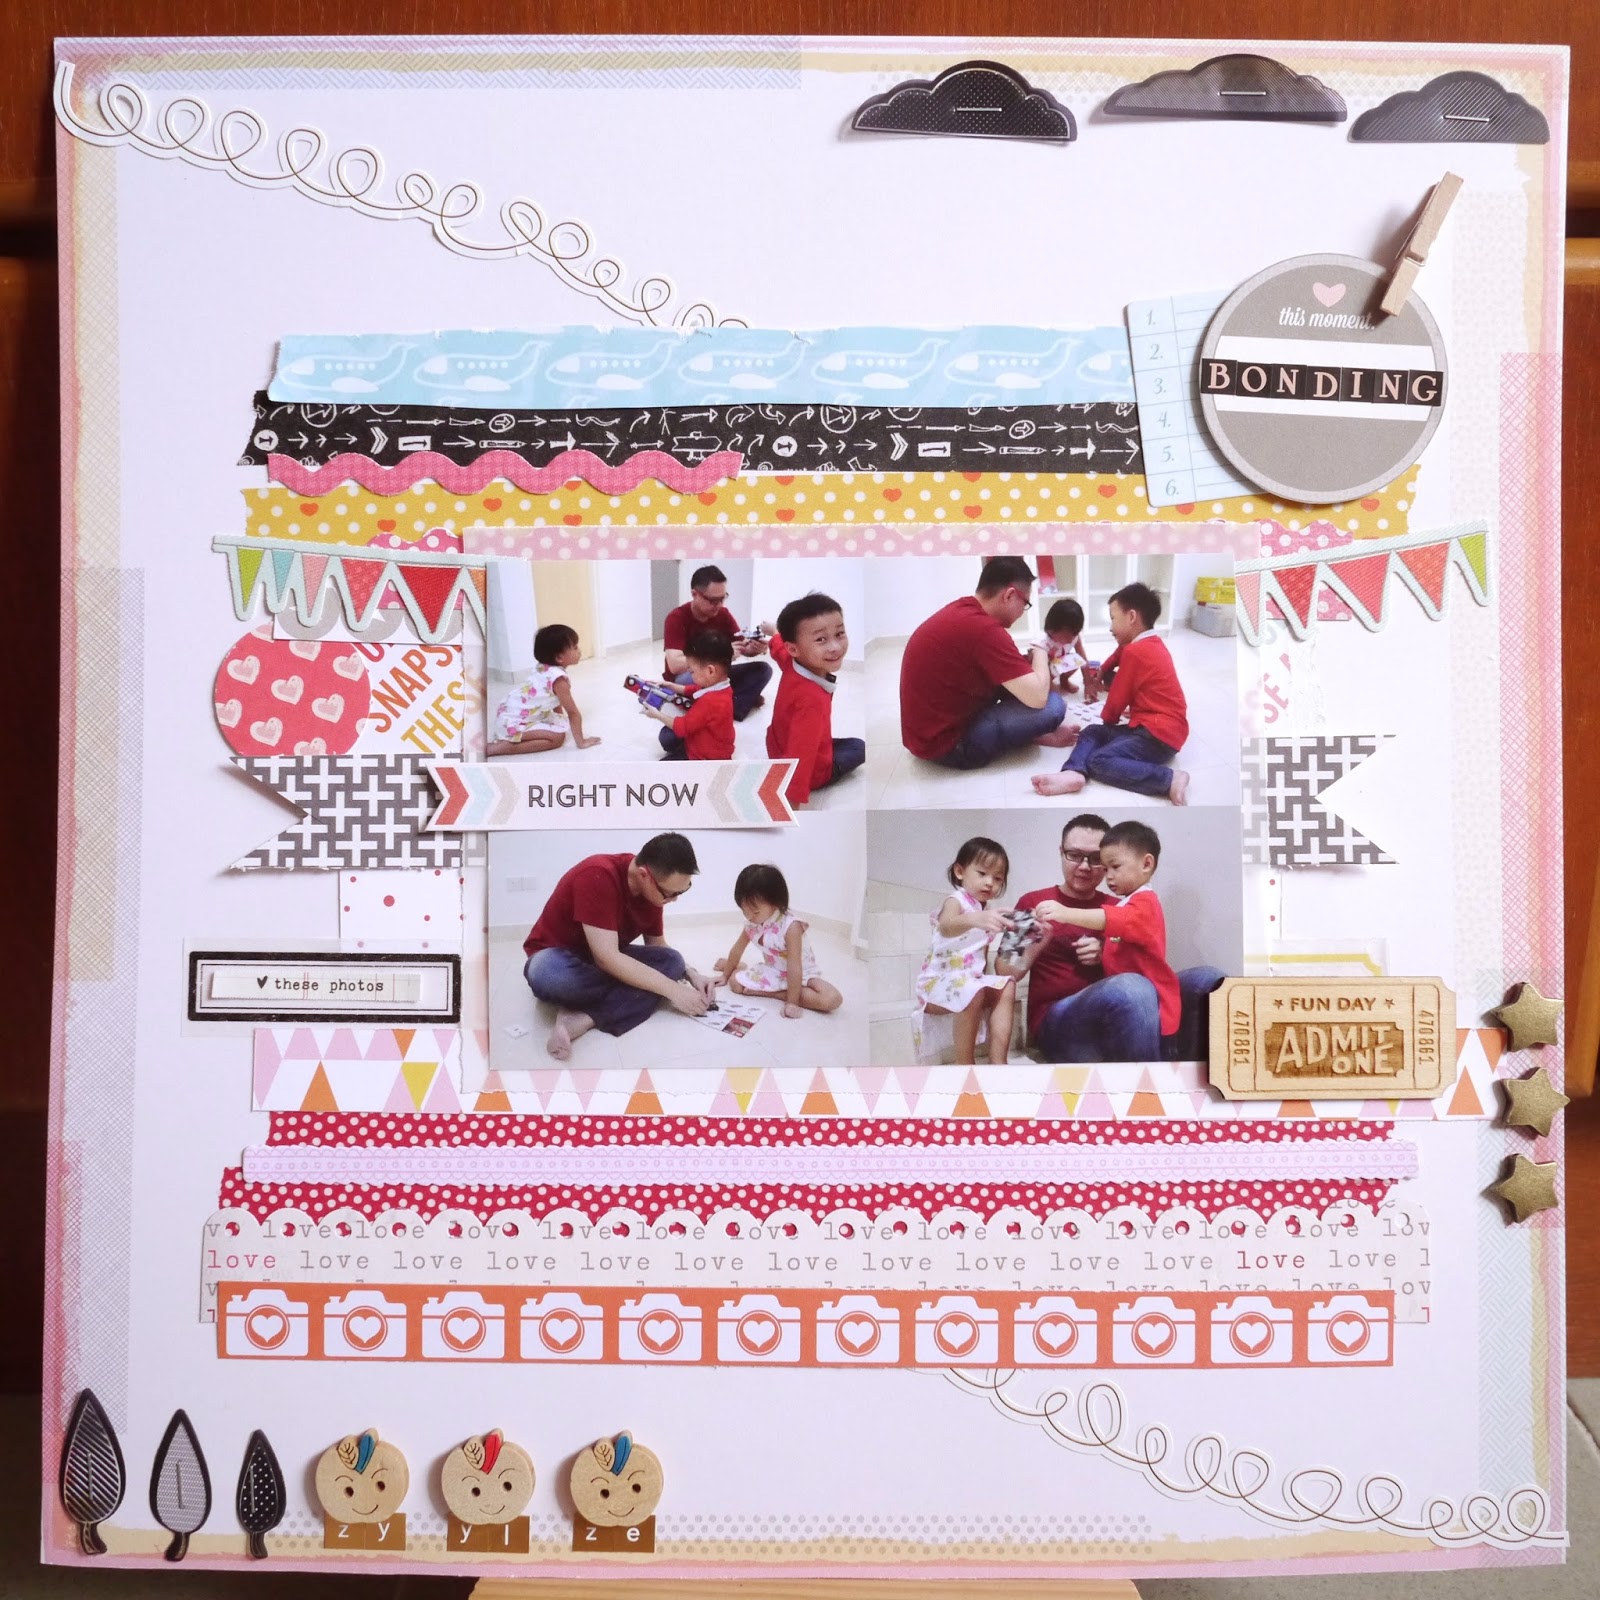
      Bonding

      Good morning and happy Sunday, ladies and gents! 

      Did I ever mention how much I love non-working Saturday? Waking up on these Saturdays, with simple breakfast and some crafty inspiration, pure bliss. I love to watch Tracy's process video, they are quite addictive (LOL) and a great way to kick start my crafty side. I watched this yesterday, and then I have this sudden urge to make pretty layouts! 

      As usual, I browsed through all the challenges that I've bookmarked. Quite a number of simple and easy-to-follow sketches, and then there's one that caught my eyes, cause I told myself, that is one crazy sketch! Crazy, because that's not my usual style. But then, I thought of the word 'challenge' and decided I really should get out of my comfort zone. And with the Sizzlin' Summer '14 Sketch 03 by Scrapbook Challenges, I started gathering supplies and a lot of patterned papers for the very challenging background.

      I did not take photo of my background cluster with my camera, but I just posted the one I took with my phone, so drop by my Instagram to check it out. That background cluster took me 45 minutes to assemble, and I used a lot of patterned papers, washi tapes and some border stickers. 

      The rest of the process, adding the photo, title and embellishments probably took another 30 to 40 minutes. The end result, a happy looking layout. 


      I would love to add stitching on the background, but I do not have a sewing machine, and hand stitching them would probably take forever, so I just gave up on that idea. I really love the look of machine stitch on layouts though.


      I love the contrast between the colorful elements and the black elements, and I added the black clouds and trees transparencies on the top and bottom corners to make the layout pops.


      My nephews and niece's initial. Love these apple wooden tokens that my sis bought for me.

      These embellishments are from OhDeerMe June kit by Freckled Fawn. Thinking of getting their August kit too, cause it looks awesome!

      And lastly, some close ups of the background cluster.


      I'm really glad I took on this challenge. Even though it is quite time consuming because of the complicated background cluster, but it's a really great way to put together a lot of patterned papers and different elements on a layout. Will I try this sketch again? Definitely yes! 

      Thank you for stopping by, and any comments are appreciated. If you like my layouts, do follow my blog and Instagram. Have a great day!

      Supplies (Patterned Papers)
      • On the Edge from Cut & Paste Collection by Amy Tangerine
      • Directions from Enjoy the Ride Collection by Echo Park
      • Project Life Honey Edition 12x12 Double Sided Designer Papers by Becky Higgins
      • Banners and Stamped from Love Me Collection by My Mind's Eye
      • Limitless, North Star, Tiny Love, Today and Vellum by Studio Calico
      Supplies (Washi Tapes)
      • Label Washi from OhDeerMe June Kit by Freckled Fawn
      • Chalkboard Arrow, Orange Polka Dot with Hearts and Scattered Red Polka Washi by Freckled Fawn
      Supplies (Border Stickers)
      • Enjoy the Ride Sticker Accent Pieces by Echo Park
      • Various paper and fabric border stickers by Heidi Grace Designs
      Supplies (Letters)
      • Gold Foil Letter Stickers by Dear Lizzy
      • Letter Stickers from local bookstore
      Supplies (Embellies)
      • Wood Ticket and Metal Stars from OhDeerMe June Kit by Freckled Fawn
      • Label Stickers from Cut & Paste Collection by My Mind's Eye
      • 6x8 Perforated Word Strips, Black & White Transparency Die Cuts and Tiny Wooden Peg by Studio Calico
      Supplies (Misc.)
      • Border Punch by American Crafts

      Friday, July 18, 2014

      Cockington Green Gardens

      Hello hello, happy Friday!

      I know I promised there will be a new layout last week, but life got in the way, and I do not have the mood to do any scrapbooking then. I really tried, I did. I took out the photos and tried to 'do something' with them, even chosen a sketch layout challenge as my template, but it just didn't feel right. So I kept all my supplies and move on with my life.

      The past Tuesday was a public holiday in my state, and with the new Let's Get Sketchy July Week 2 Sketch, I managed to finally create a layout. (I found that I always ended up using sketches from LGS even though I have a few more sketch challenge blogs that provide weekly sketch)

      This layout has minimal layering, but embellishing can be found here and there. I was having trouble embellishing when I tried to scrapbook these photos last week. All I knew was I want to use that Charm ‘Bliss’ Delight paper by Jen Allyson, badly. The floral pattern and the color scheme really go well with the photos and the theme, so I felt that I have got to use that.

      I have chosen this ombre background, which has blue on one side and green on the other, and that is pretty much how my photos look like, greenish gardens with clear blue sky at the background.


      I have the title printed on the photo, but I would like to add the location (Canberra) on the layout too. This epoxy typist fonts letter sticker is from my local bookstore. When I first opened the package, it smelt strongly of plastic, which makes me wonder what material they used for these, quite terrifying LOL


      I love the Charm ‘Bliss’ Delight patterned paper so much I did not want to cover it up, but it was too plain by itself. This was when the border stickers came to the rescue! I’m glad I pulled out these, because they look lovely together with the patterned paper.


      As usual, the last step is embellishing. I used up a lot of Amy Tangerine’s products which has a lot of pretty trees and flowers and blues and greens. The clouds fabric stickers are very eye-popping too, and I used them to cover up the awkward angles on the photos. Lastly, two tags on the left bottom corner of the layout and voila! A pretty layout is made.


      Thank you so much for stopping by and any comments are appreciated. (And while you’re at it, follow my blog and Instagram too?)

      Supplies (Patterned Papers)
      • Adorbs ‘Special’ Striking Paper by Jen Allyson from My Mind’s Eye
      • Charm ‘Bliss’ Delight Paper by Jen Allyson from My Mind’s Eye
      Supplies (Letters)
      • Epoxy Typist Fonts from local bookstore
      • Raspberry Tiny Alpha Stickers by Kaiser Craft
      Supplies (Border Stickers)
      • Border Stickers by Heidi Grace Designs
      • Pretty Party Border Stickers by Crate Paper
      Supplies (Embellies)
      • Bits Die Cut Cardstock Shapes, Noteworthy Accent & Phrase Sticker Book, Oh Yes Fabric Stickers, Pigment Fabric Stickers, Doodle Dimensional Stickers by Amy Tangerine
      • DIY Shop Accent Stickers by Crate Paper
      • Hummingbird Collectibles by Kaiser Craft
      • Daydream Fabric Stickers by Heidi Grace Designs
      • Mustard Color Shine by Heidi Swapp
      • Geotag Chipboard Shapes by Studio Calico
      p/s: this post was supposed to be up on my blog on yesterday, but my Internet was down.

      Deepest condolences to the family and friends of passengers and crews on board of MH17.